


How to Quickly Fix 'No Sound' in Windows

All told,
Windows 7 has been pretty good to me. So much so that I've
been reluctant to move to a later version.
But there is one issue that still plagues me. Every so often after booting up, the speaker icon in the lower right hand corner of my desktop will have a little red x next to it. This indicates there is no sound available.
It looks like this:

This really drove
me crazy in the early days. What I used to do was simply reboot.
But reboots are annoying. They take time. And they only correct
this particular problem about 75% of the time. Worse still,
sometimes rebooting won't work even after a string of reboots.
But no more! I've discovered a fix that I assure you, once you learn, is much quicker than a reboot.
Here's what to do:
[note:
These steps are specific for a Windows 7 PC, but with tweeks
they work for other systems as well]
Go into your Control Panel. (After clicking the Start button, type "Control Panel" in the search text box.)
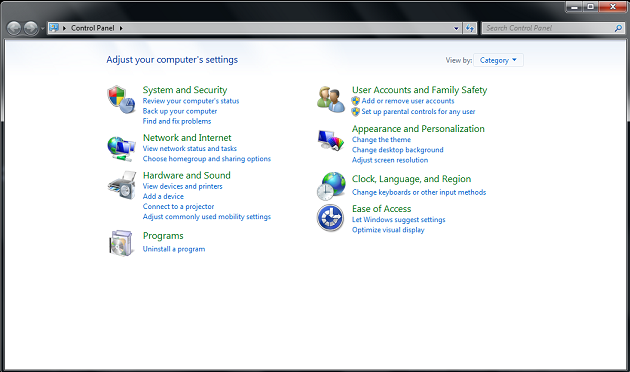
Click the "Hardware and Sound" category.
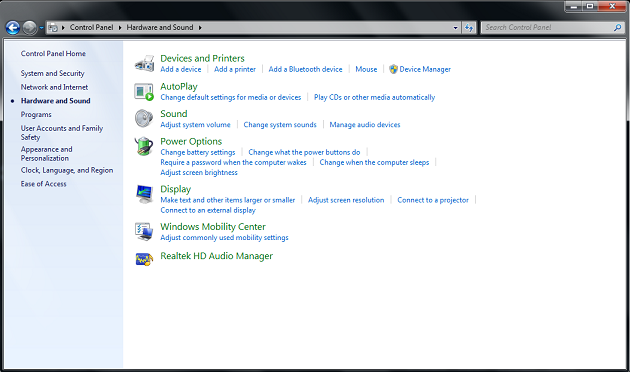
Click "Device Manager" under the "Devices and Printers" category.
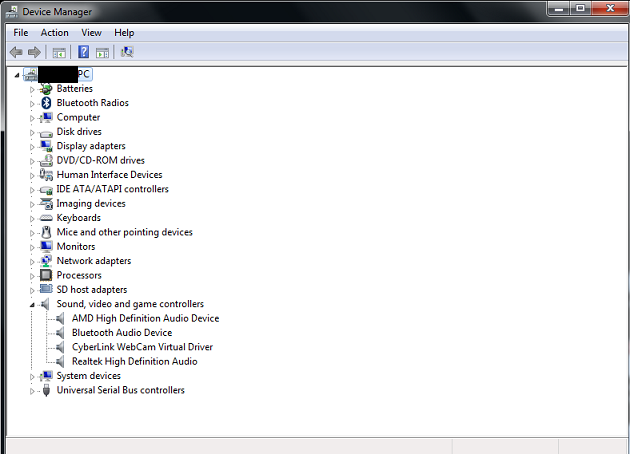
Expand the "Sound,
video and game controllers" category and identify the device
from the list that is causing the 'no sound' issue. This might
take some trial and error, but in all likelihood it is the same
one that causes me the issue: Realtek High Definition Audio.
Click Realtek High Definition Audio (or whatever your device is specifically named).
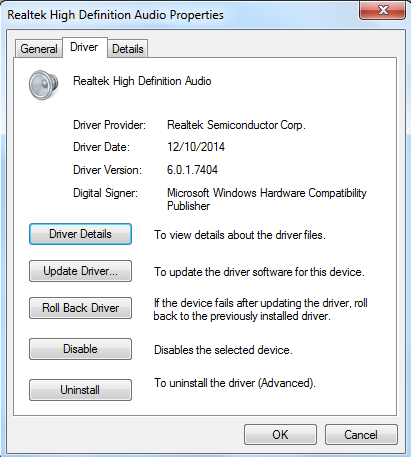
Under the "Driver" tab, you see that the driver is enabled because the button says "Disable." You are going to click on this "Disable" button to temporarily disable the audio driver – temporarily, because you are going to immediately enable it again.
By clicking on the "Disable" button, you get a pop-up warning message.
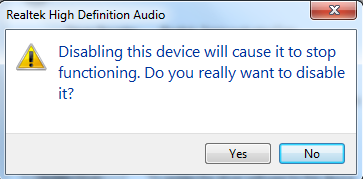
Click "Yes."
The "Driver" tab now shows that the driver is disabled because the button says "Enable."

By clicking the "Enable" button, the little red x next to your speaker icon should instantly vanish and you are ready to rock n' roll again!
All rights reserved.
Last
modified: January 15, 2017